
Table of Contents
- What Is an Ear Stack, Exactly?
- Know Your Piercing Placements First
- The Foundation: Start With Your Lobe
- Building Upward: Cartilage and Mid-Ear Pieces
- Ear Cuffs: Stacking Without New Piercings
- The Rules That Actually Matter (and When to Break Them)
- Mixing Metals, Sizes, and Textures Without Chaos
- Ear Placements vs Jewelry Style: A Quick Reference
- Common Mistakes That Make a Stack Look Cluttered
- How to Edit and Refine Your Stack Over Time
- Frequently Asked Questions
- The Bottom Line
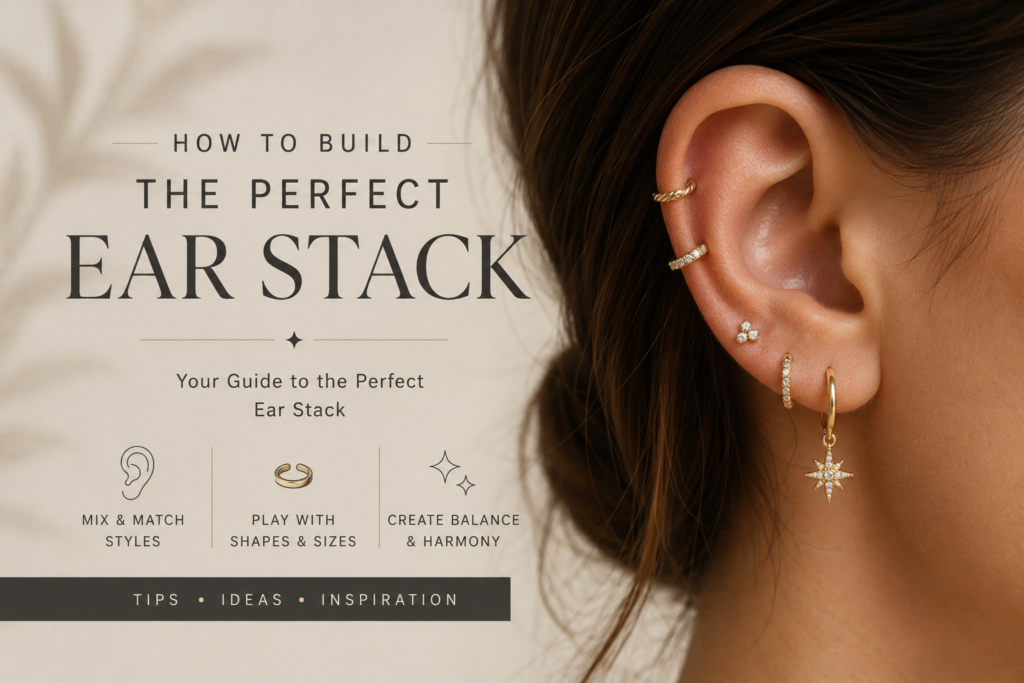
An ear stack, sometimes called a curated ear, is what happens when earrings stop being an afterthought and start being a composition. Instead of grabbing whatever’s closest in the jewelry box, you’re choosing pieces that work together across multiple placements on the ear.
Done well, it looks effortless. Done badly, it looks like clutter. The difference comes down to a handful of principles that are actually pretty easy to learn once you understand how the ear itself is structured. This guide walks through exactly that, placement by placement.
What Is an Ear Stack, Exactly?
An ear stack is the practice of wearing multiple earrings across several piercings on one or both ears in a deliberate way. It’s not about how many pieces you’re wearing. It’s about whether those pieces look chosen rather than random.
The idea has exploded in the last few years, evolving from a niche editorial look into something most jewelry brands now design entire collections around. Rather than a single stud in each ear, the ear becomes what stylists increasingly call an earscape, a small, layered canvas built from studs, hoops, cuffs, and chains working in harmony.
Nébuleuse Bijoux is one brand built specifically around this idea. Their whole catalog is organized by ear placement, from lobe to helix to conch, which makes it genuinely easy to shop for a stack piece by piece rather than guessing.



Know Your Piercing Placements First
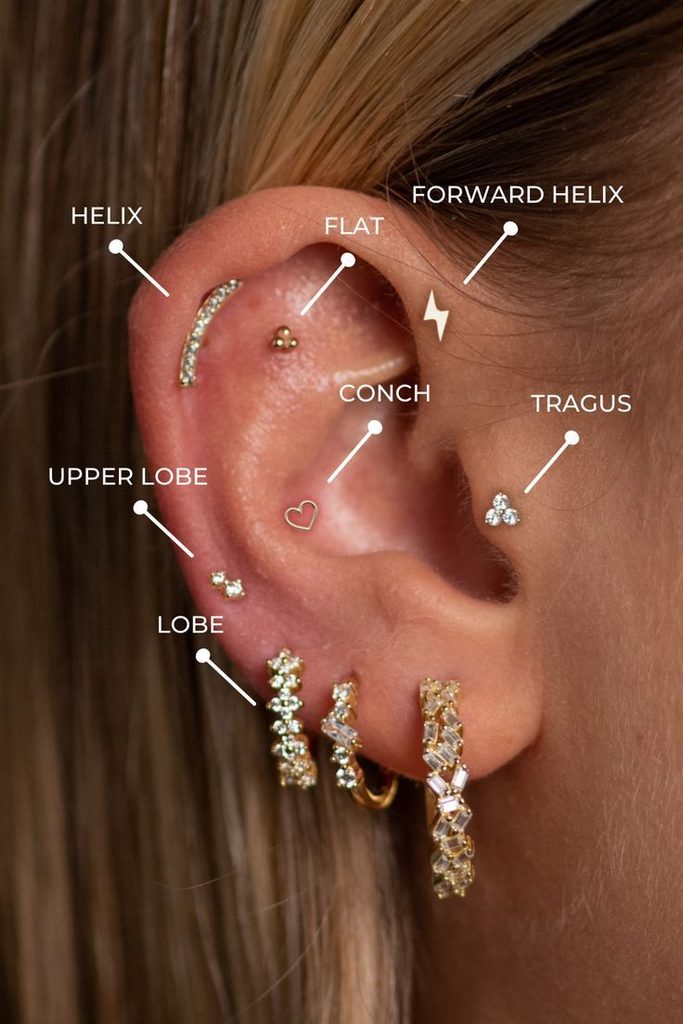
Before picking a single piece of jewelry, it helps to know what’s actually available on the ear and what each spot tends to suit.
The lobe is the soft lower portion, and it’s the most forgiving placement in terms of pain and jewelry variety. It works with studs, hoops, drops, and huggies, and most people start here before adding anything else.
Moving upward, the helix sits along the upper cartilage rim. It suits small flat-back studs, tiny hoops, and delicate rings, and it’s usually the second or third piercing people add once the lobe is established.
The tragus, that small flap of cartilage just in front of the ear canal, works best with small studs or tiny huggies given the limited space. The conch, the larger flat area in the middle of the ear, can handle both studs and small hoops and often becomes a focal point in a stack because of how visible it is.
Then there’s the daith and rook, both cartilage folds that sit deeper in the ear and typically take small hoops or curved barbells. These tend to come later in a stack, once you’ve built confidence with the more accessible spots.


The Foundation: Start With Your Lobe
The lobe is the anchor of any stack, and it’s worth treating it that way. This is where a statement piece, a bold hoop, or a piece with real presence tends to work best, since it sets the tone for everything built above it.
Most people have room for two or three lobe piercings stacked vertically. A common approach is to put the largest, most eye-catching piece in the first (lowest) lobe piercing, then graduate down in size as you move upward. A bold hoop at the bottom, a smaller stud in the middle, and a tiny gem at the top creates a natural visual rhythm rather than three competing pieces of equal weight.
Nébuleuse Bijoux organizes its lobe collection specifically around this kind of layering, with créoles (hoops), puces (studs), and small charm chains sized to work together rather than fight for attention. You can browse their full lobe collection to see how the graduated sizing plays out in practice.
Building Upward: Cartilage and Mid-Ear Pieces
Once the lobe is set, the cartilage placements are where a stack really starts to feel curated rather than just accessorized.
The helix and conch are good candidates for slightly more delicate pieces than the lobe carries, since the cartilage sits higher and closer to the face. A small flat-back stud or a thin hoop tends to read better here than anything oversized, which can look heavy against the smaller surface area of the upper ear.
Texture matters more at this stage too. Mixing a solid polished hoop with a small textured or gem-set stud adds dimension without adding visual noise. The goal is variation within a consistent story, not a completely different aesthetic at every piercing.
Spacing new cartilage piercings out matters for a practical reason as well. Cartilage takes longer to heal than lobe tissue, often six months to a year, so adding piercings gradually gives each one time to settle before you introduce more jewelry or swap pieces around.
Ear Cuffs: Stacking Without New Piercings
Not everyone wants more holes in their ear, and that’s a completely valid way to build a stack. Ear cuffs grip the cartilage without any piercing required, and they’ve become a genuine staple of ear stacking for exactly that reason.
A cuff can layer directly over an existing piercing to add visual weight without committing to anything permanent, or it can sit entirely on its own for a full no-piercing stack. Newer cuff designs have moved well past the simple wraparound band too, with more sculptural and layered shapes showing up across most jewelry brands’ current collections.
This is a genuinely useful entry point if you’re stack-curious but not ready to commit to more piercings. You can build most of the visual effect of a full stack with just one or two well-placed cuffs and your existing lobe piercings.


The Rules That Actually Matter (and When to Break Them)
A few genuine styling principles separate a stack that looks intentional from one that looks accidental.
The first is what stylists often call the 2:3 rule, wearing more earrings on one ear than the other. Three pieces on the right and two on the left, for example, rather than a perfectly matched set on both sides. This deliberate asymmetry is what gives a stack its editorial, individually-curated feel rather than looking like a matched pair from a department store counter.
The second principle is graduation. Earrings should generally get smaller as they move up the ear, from the boldest piece at the lobe to the most delicate piece at the top. This creates a visual flow the eye can follow naturally, instead of jumping between pieces of similar size and weight.
The third is metal consistency. Sticking to one metal family, whether that’s gold, silver, or a mix that’s clearly intentional rather than accidental, keeps a stack feeling cohesive even when the piece shapes vary a lot.
None of these are hard laws. They’re starting points. Once you understand why they work, you’ll also start to see where breaking one on purpose, an unexpected mixed metal moment, for instance, can actually make a stack more interesting rather than less.
Mixing Metals, Sizes, and Textures Without Chaos
Texture is the detail most people skip, and it’s often what separates a good stack from a great one. Combining a smooth polished hoop, a small textured stud, and something with a bit of sparkle adds real dimension to a stack instead of leaving it visually flat.
Size variation matters just as much as texture. A stack built entirely from similarly sized pieces tends to blur together at a glance, while a stack with clear big, medium, and small anchors reads immediately as intentional.
The safest way to start is to pick one dominant metal tone and let that be the constant, then vary shape and texture piece by piece. A titanium or gold-toned piercing collection like the one from Nébuleuse Bijoux, for example, makes this easier since their pieces are designed within a consistent finish family, so mixing across placements doesn’t require much extra thought.


Ear Placements vs Jewelry Style: A Quick Reference
| Placement | Typical Pain Level | Best Jewelry Style | Healing Time |
|---|---|---|---|
| Lobe (1st) | Low | Studs, hoops, statement drops | 6-8 weeks |
| Lobe (2nd/3rd) | Low | Small studs, mini hoops | 6-8 weeks |
| Helix | Moderate | Flat-back studs, small hoops | 3-6 months |
| Tragus | Moderate | Tiny studs, small huggies | 3-6 months |
| Conch | Moderate to high | Studs, small to medium hoops | 6-9 months |
| Daith/Rook | Higher | Small hoops, curved barbells | 6-12 months |
Healing times vary from person to person, and this table reflects general ranges rather than guarantees. It’s a useful reference for planning the order you add pieces in, since starting with the lower-pain, faster-healing placements makes the whole process of building a stack far more manageable.
Common Mistakes That Make a Stack Look Cluttered
The single most common mistake is doing everything at once. Adding several new piercings in one sitting, then trying to fill all of them with jewelry immediately, almost always reads as busy rather than curated, and it also isn’t great for healing.
Matching every single piece too closely is another frequent issue. A stack made entirely of identical small gold hoops has no visual hierarchy for the eye to follow, so it ends up looking flat despite technically being a “stack.”
Ignoring proportion is the third common trap. A large statement hoop at the helix, where the cartilage is small and close to the face, tends to overwhelm the ear rather than complement it. Save the boldest pieces for the lobe, where there’s more room for them to breathe.
Finally, rushing the whole process tends to backfire. A stack built over several months, with time to actually live with each piece and see what earns its place, almost always looks more considered than one assembled in a single shopping trip.
How to Edit and Refine Your Stack Over Time
The best ear stacks aren’t built once and left alone. They’re edited continuously, the same way a great wardrobe gets curated over years rather than assembled in a weekend.
A useful habit is giving any new piece about a week before deciding if it stays. If it doesn’t feel like it’s earning its place next to everything else, it’s fine to swap it out or move it to a different placement entirely.
Existing piercings are also worth revisiting periodically. Just because a stud has lived in your second lobe piercing for two years doesn’t mean it’s still the right choice once you’ve added three more pieces around it. Sometimes refining a stack means changing what’s already there rather than only adding something new.
This is also where having a jewelry source built around ear-specific collections helps. Because Nébuleuse Bijoux organizes everything by placement and by coordinated collection, it’s easier to swap a single piece in or out without accidentally breaking the metal or style consistency of the rest of the stack.



Frequently Asked Questions
How many piercings do I need for a proper ear stack? There’s no minimum, honestly. A good stack can work with just two piercings and one ear cuff, or it can involve five or six placements across the ear. What matters more than the count is whether the pieces you’re wearing feel chosen rather than random.
Can I build a stack without getting new piercings? Yes, and it’s a completely legitimate approach. Ear cuffs grip the cartilage without any piercing at all, and they can be layered over existing lobe piercings or worn entirely on their own to create most of the visual effect of a fuller stack.
How long should I wait between adding new piercings? A common guideline is spacing new piercings out by at least three months, though cartilage placements often benefit from even longer. This gives each piercing time to heal fully and also gives you time to figure out what jewelry you actually want there before committing further.
Do all my earrings need to match? No, and matching everything too closely often makes a stack look flatter rather than more polished. The goal is coordination, similar metal tones and a consistent style story, not identical pieces repeated across every placement.
What’s the easiest way to start if I’m completely new to this? Start with the piece types you already reach for most, which for most people is a simple stud and a clean hoop, and build outward from there placement by placement. Add slowly, live with each addition for a bit, and let the stack develop rather than trying to finish it in one order.
The Bottom Line
Building a genuinely good ear stack comes down to a small set of principles: start at the lobe, graduate your sizes upward, keep your metals consistent, and let asymmetry work in your favor rather than against it. None of it requires getting every piercing at once or spending a fortune in a single order.
What makes a stack feel curated rather than cluttered is patience and intention. Choose pieces because they earn their spot next to what’s already there, not because a set happened to be on sale.
If you’re ready to start building or refining your own, Nébuleuse Bijoux organizes its entire collection by ear placement, from lobe studs to helix hoops to conch pieces, which makes putting together a coordinated stack a lot more straightforward than shopping piece by piece from scratch.